Windows
1. Generate SSH private and public key pair
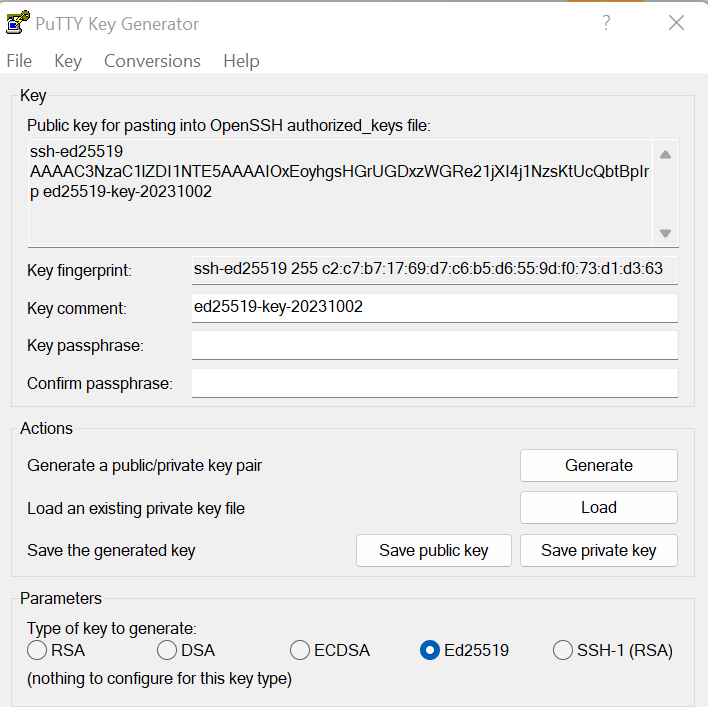
Open PuTTYgen.exe from the Windows programs list and proceed with the following steps.
- Under Parameters, select the type of key Ed25519 (this type of key is recommended on HPC Vega).
- Under Actions, click Generate.
- You will be instructed to move the mouse cursor around within the PuTTY Key Generator window as a randomizer to generate the private key.
- Once the key information appears, it is optional to set passphrase for your SSH key – under Key passphrase and Confirm passphrase.
- Save the private key to the desktop as id_rsa.ppk.
- Save the public key to the desktop as id_rsa.pub.
- Save the public key marked with yellow colour in the text file.
2. Copy your public key to Fido
This procedure is explained in the Fido Upload section.
Note
Upload on Fido public part of the ssh key saved in the text file.